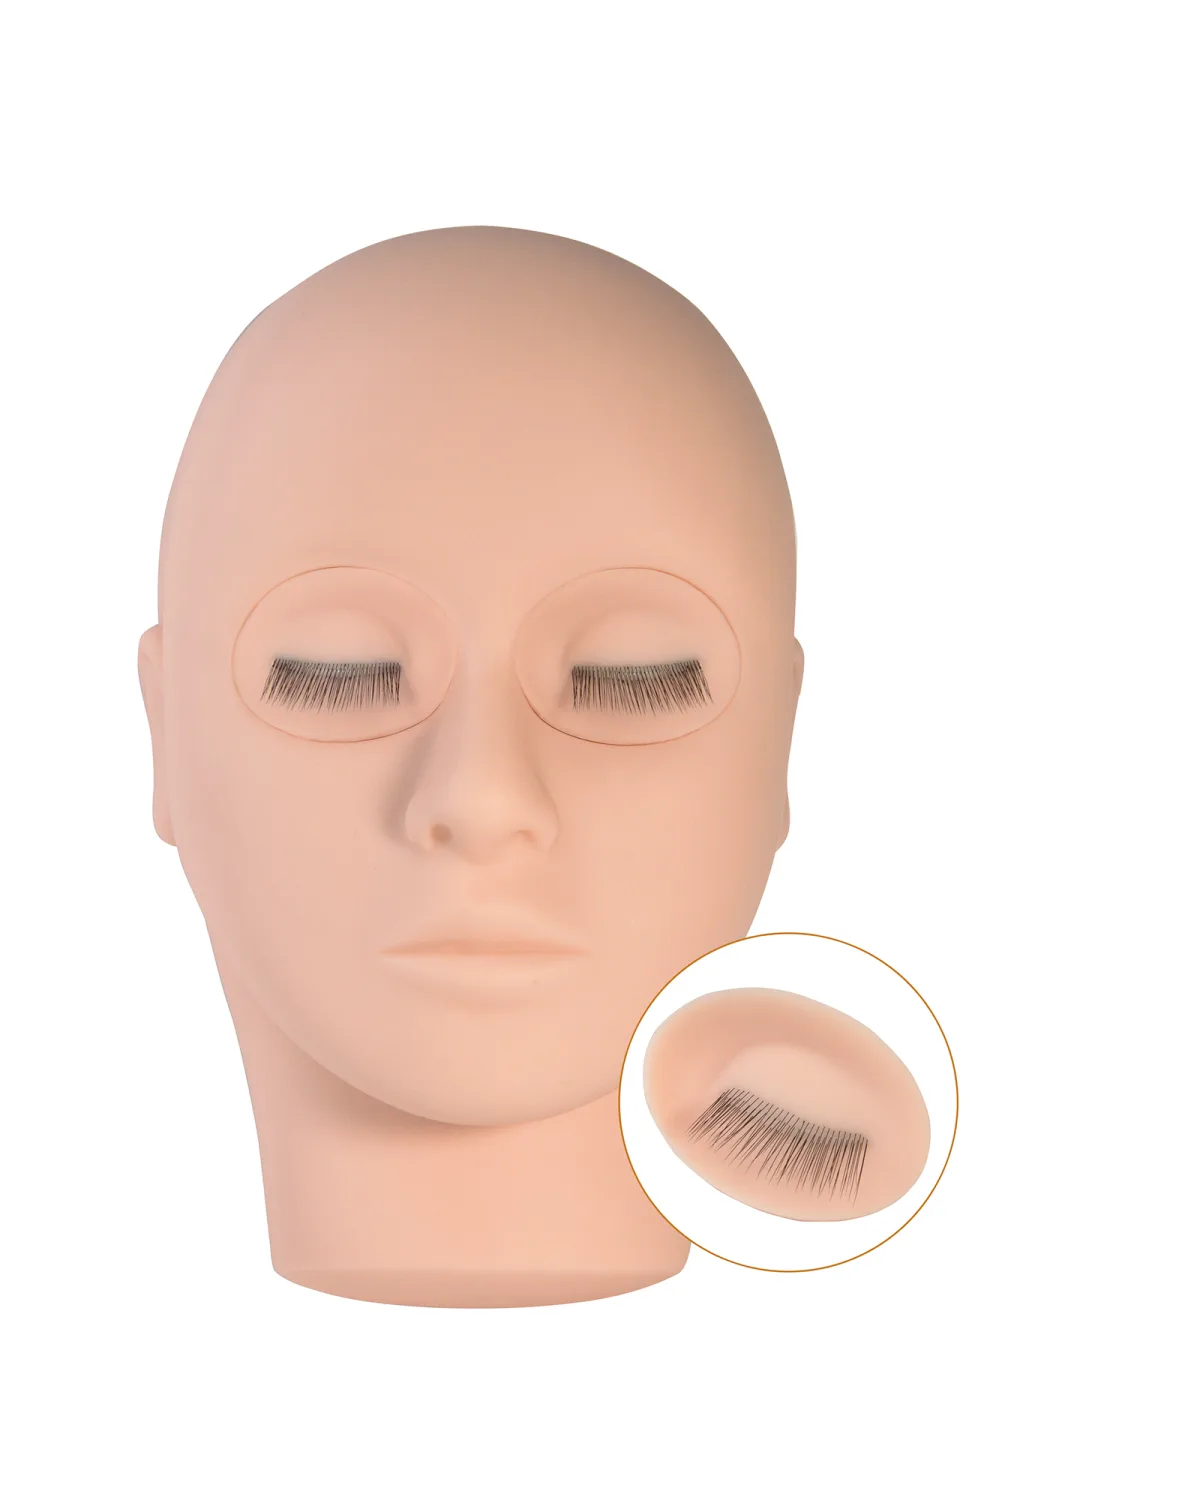
Most volume practice falls apart on a real client for one reason: the artist learned on a flat strip. A single row of lashes lets you skip isolation, so the first appointment with depth and crossing lashes is a shock. A 3-layer training head removes that gap. Three stacked layers — about 40 lashes each, roughly 120 in total — reproduce the density and growth direction of a natural lash line, so every fan you place has to clear the layers beneath it, exactly like skin.
This guide walks through applying volume lashes on the head, layer by layer.
What you need
Your usual volume kit — isolation tweezers, a fanning or volume tweezer, lash adhesive, and a tray of lightweight volume lashes. Mount the head on a tripod or table clamp through its standard 1-inch (2.6 cm) hole and seat it firmly before you start, so it doesn't shift while you isolate and place. Sit at the same working height and angle you'd use on a client; train the posture, not just the hands.
Step 1 — Map the three layers
Before you pick up adhesive, look at the lash line straight on and find the three rows. On the Kashinfuu head the lashes are individually hand-implanted across three stacked layers, not glued strips, so the rows have genuine depth — a bottom layer closest to the lid line, a middle, and a top layer. The whole point of training here is that you isolate down into the stack instead of skating across a single row. Spend a minute identifying where one layer ends and the next begins; that mental map is what transfers to a client.
Step 2 — Isolate a single lash from the layers beneath
Start on the bottom layer at the outer corner. With your isolation tweezer, lift and separate one natural lash so it stands clear of the lashes around and beneath it. Because the head is hand-implanted and non-detachable, you can isolate and gently tug without the lash line lifting or budging — so you can practise real pressure instead of babying a strip that peels. Hold the isolation. If your fan can still touch a neighbouring lash, you haven't isolated cleanly; reset and try again. This is the single skill the 3-layer build exists to drill, so don't rush it.
Step 3 — Build your fan
With the isolation held, build your volume fan off the strip with your fanning tweezer — pinch the base, fan the tips evenly, and keep the bases lined up so they bond as one point. Aim for a fan that suits the layer you're working: lighter, narrower fans read more naturally on the bottom and middle layers, with a touch more spread reserved for the top. Dip the base in adhesive, wipe off any excess, and keep the bead small. A heavy base is the usual reason a fan slides or closes on a real lash line.
Step 4 — Place the fan along the natural growth direction
Bring the fan in and seat its base onto the isolated lash, a hair above the lid line — never on the silicone skin. Follow the growth direction of that layer: the head reproduces true-to-life thickness, length, curl and growth direction, so a fan placed against the natural angle will look wrong here exactly as it would on a client. Hold for a beat while it grabs, then release the isolation and check that the fan moves with its own lash and isn't stuck to a neighbour. Work outer-to-inner along the bottom layer first.
Step 5 — Work up through the layers
Once the bottom layer is mapped out, move to the middle layer, then the top, isolating into each one in turn. This is where a flat practice head can't help you and the 3-layer head earns its keep: you learn to lift a top-layer lash clear of everything under it, place a fan, and not disturb the work already sitting below. Keep checking direction and fan-to-lash isolation as you climb. Done well, the finished set has the depth and crossing pattern of a natural volume set rather than a flat fringe.
Drills worth repeating
The head's high density makes it a rigorous, repeatable challenge, so build speed with focused reps:
- Isolation laps — isolate one clean lash on each layer, bottom to top, with no adhesive. Time yourself; chase clean over fast.
- Consistent fans — build ten fans of the same width and lay them out before placing any. Train your hands to repeat a shape.
- Direction match — place a full corner following each layer's growth angle, then step back and check the fans flow as one.
- Retention pressure — once set, gently tug placed fans to feel a secure base. The implanted line takes it without lifting.
Resetting and re-lashing the head
When a practice session is done, reset the head for the next round — see how to clean a practice head for the full routine. After enough heavy practice the lash line will eventually be spent. You don't scrub it back to life; the eye is a pop-out module, so you swap the eye module and keep the same head and mount in service. For a training room, the practical setup is one head per student plus a small stock of replacement modules on hand — which keeps your supply cost a small, planned one. You can order heads and refill modules factory-direct from one supplier.
Factory-direct · OEM welcome
Kit out your training room.
One head per student plus a stock of replacement eye modules — quoted factory-direct, with OEM packaging on request.